Nife GIT Actions Quickstart
Learn to deploy actions using Git Actions
Continuous Deployment using Nifectl (CLI) with GitHub#
- Ensure that your project code is available on GitHub..
- Get a Nife API token with nifectl auth token or login to the UI and fetch the Token
- Go to your newly created repository on GitHub and select Settings.
- Go to Secrets and create a secret called
NIFE_ACCESS_TOKENretrieved in Step Two - Clone the repository to your local machine to edit it
- Create .github/workflows/main.yml with these contents
- Commit your changes and push them up to GitHub.
The next changes and pushes will trigger based on the workflow. In this case, new images will be automatic deployed
- Monitor the Action Tabs in the project repository to view the logs.
Continuous Deployment using Oikos(UI) with GitHub#
- Add your Github PAT Here: https://launch.nife.io/settings/token . (If you need assistance obtaining Github PAT, refer to our step-by-step guide.)
- Deploy your application using code deployment. know more
Copy your Nife API token from https://launch.nife.io/settings/token, go to your repository on GitHub, select Settings, navigate to Secrets, and create a new secret called NIFE_ACCESS_TOKEN, then paste the copied access token.
Clone the repository to your local machine to edit it.
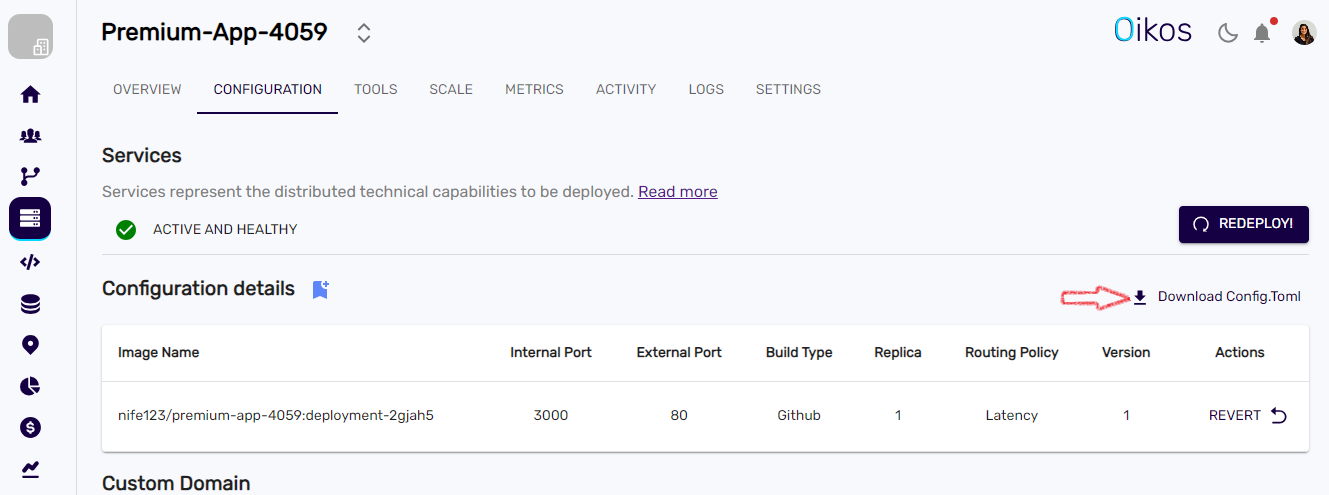
Download the
Config.tomlfile from your app configuration page and then rename it tonife.toml.
Edit the your app toml file
Attach
/archive/refs/heads/main.zipto your GitHub link:Relpace build part
Move the
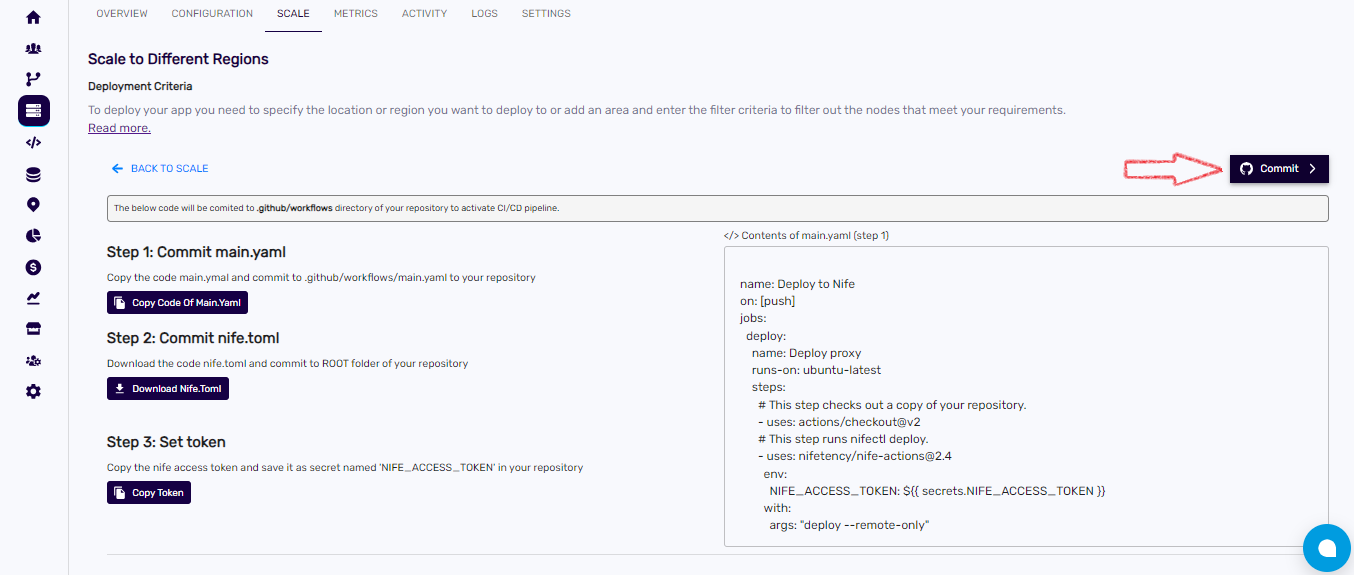
nife.tomlfile to the root folder of your project. Then push it to GitHub.Open Your App Scale Section. Know More. Click on Integrate CI/CD with GitHub and then click on
Commit.

This pushes the main.yaml file to GitHub, which will trigger the workflow. In this case, new images will be automatically deployed.
- Monitor the Action Tabs in the project repository to view the logs.
More#
Find GitHub Actions on MarketPlace
Learn More GitHub Actions Documentation